tips on designing a home studio - plus behind the scenes process
EDITED TO INCLUDE KILN INFORMATION
For my first blog post on my new website I’m providing you with some advice and tips if you are thinking of planning your own home studio in the future, as well as showing some behind the scenes of me at work in the studio. My friend Carolyn Carter took most of these photos and included them in her own blog post here.
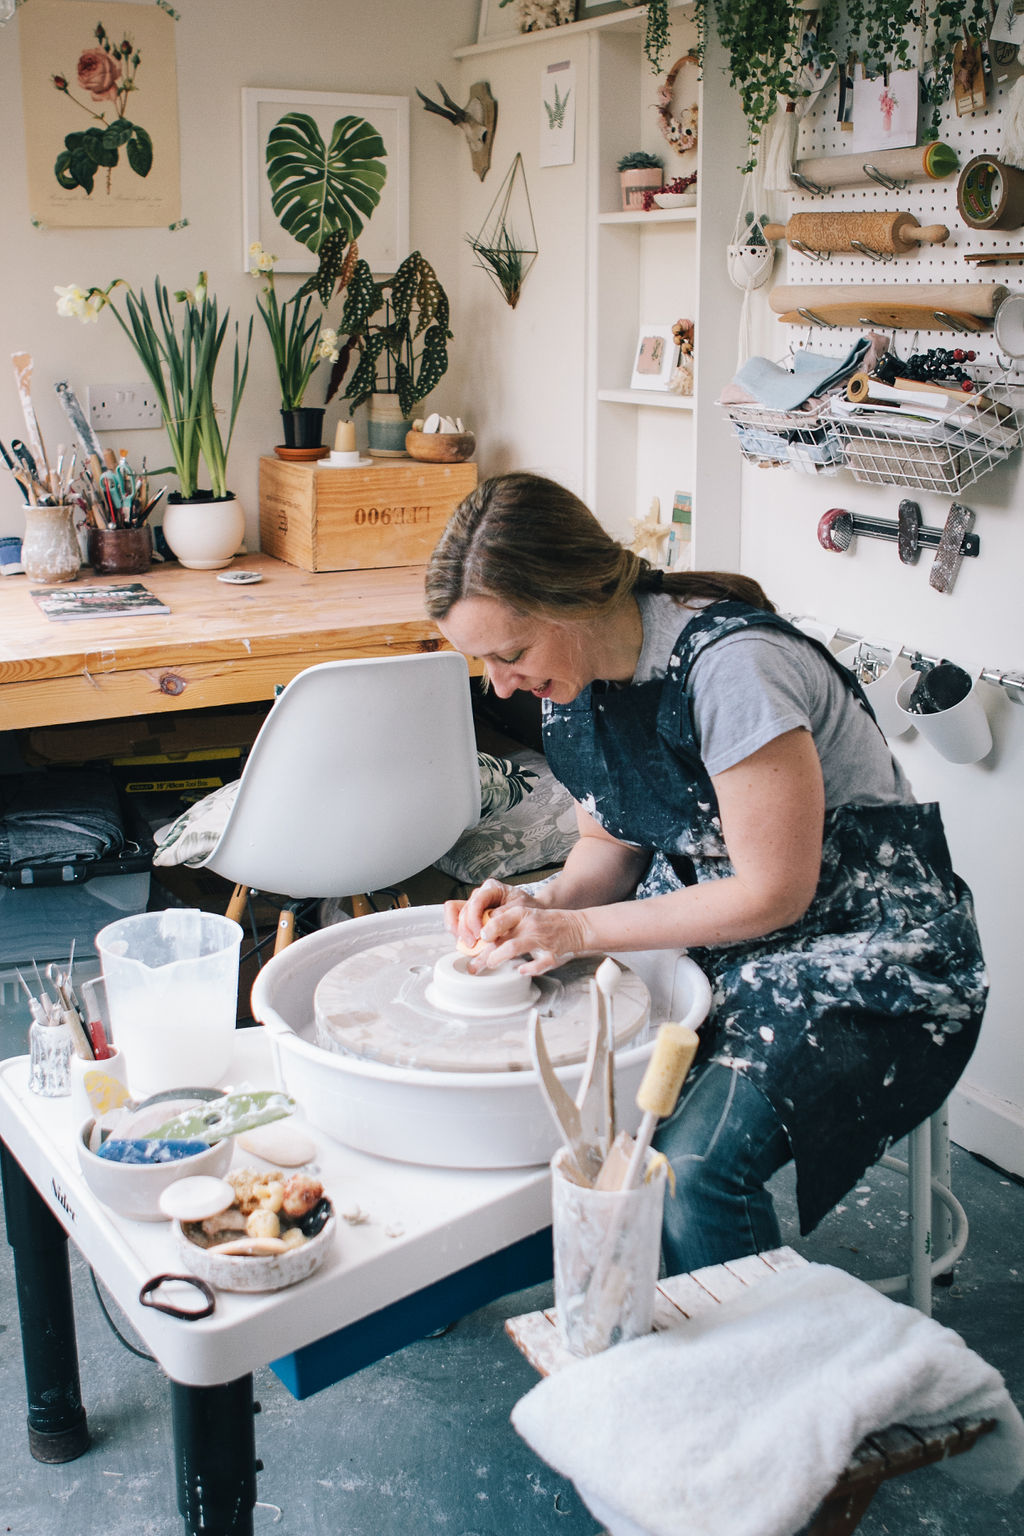
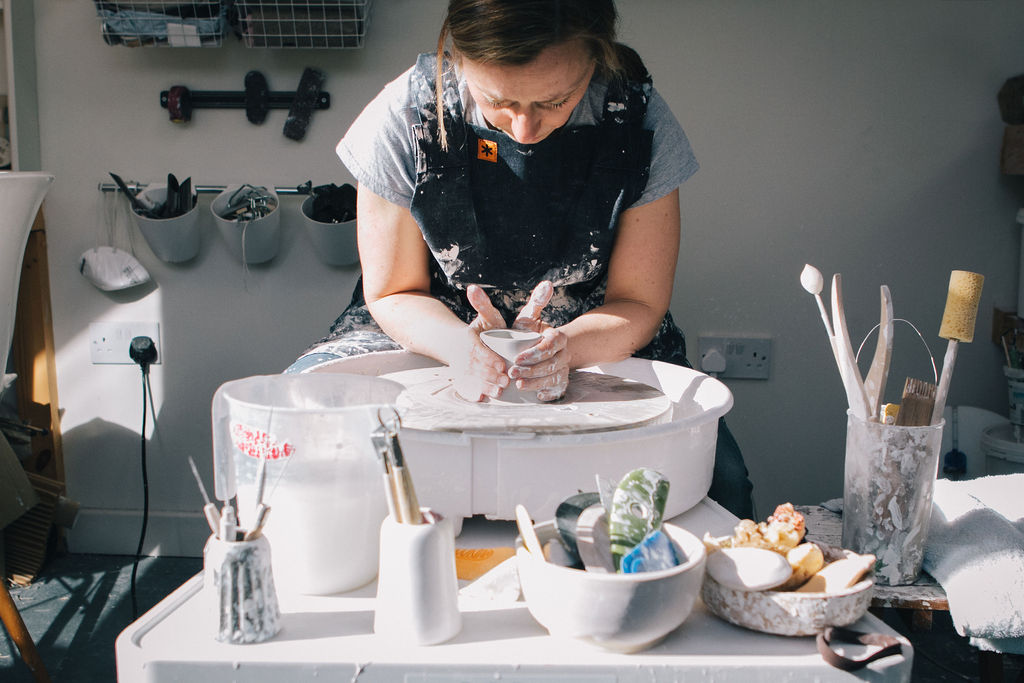
Ceramic artist, Katie Robbins in her pottery studio.
The making of a home studio
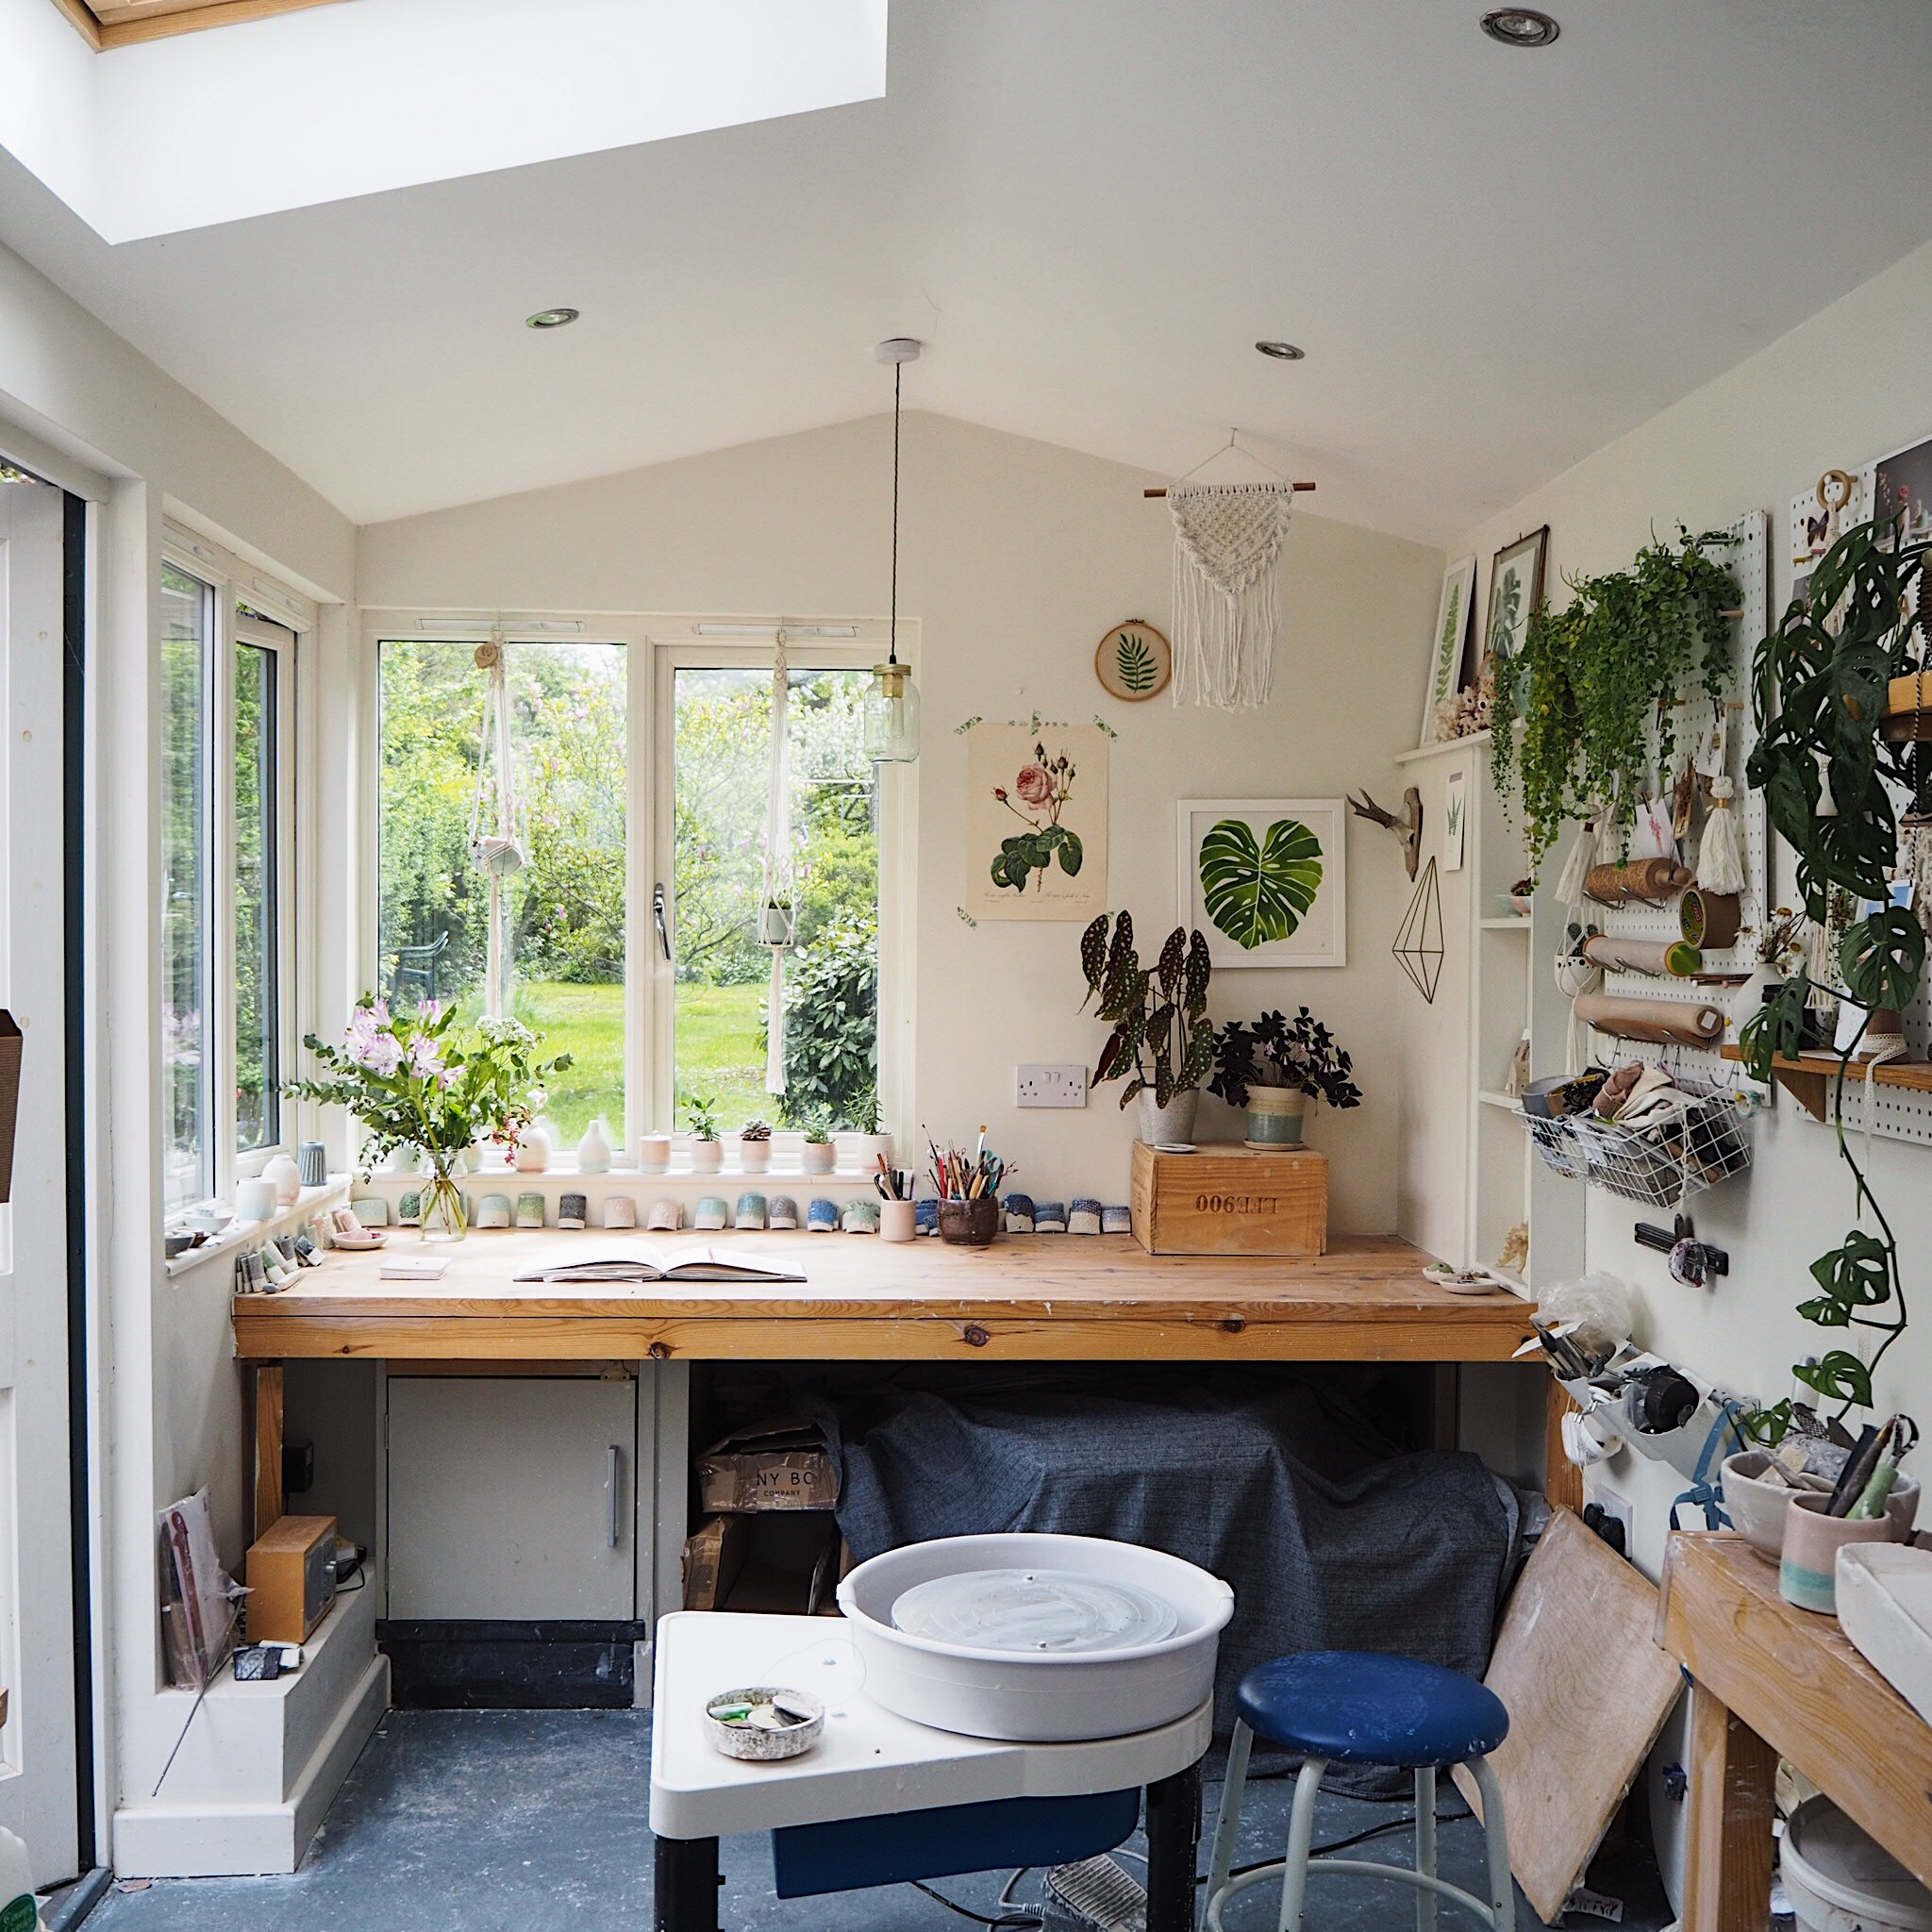
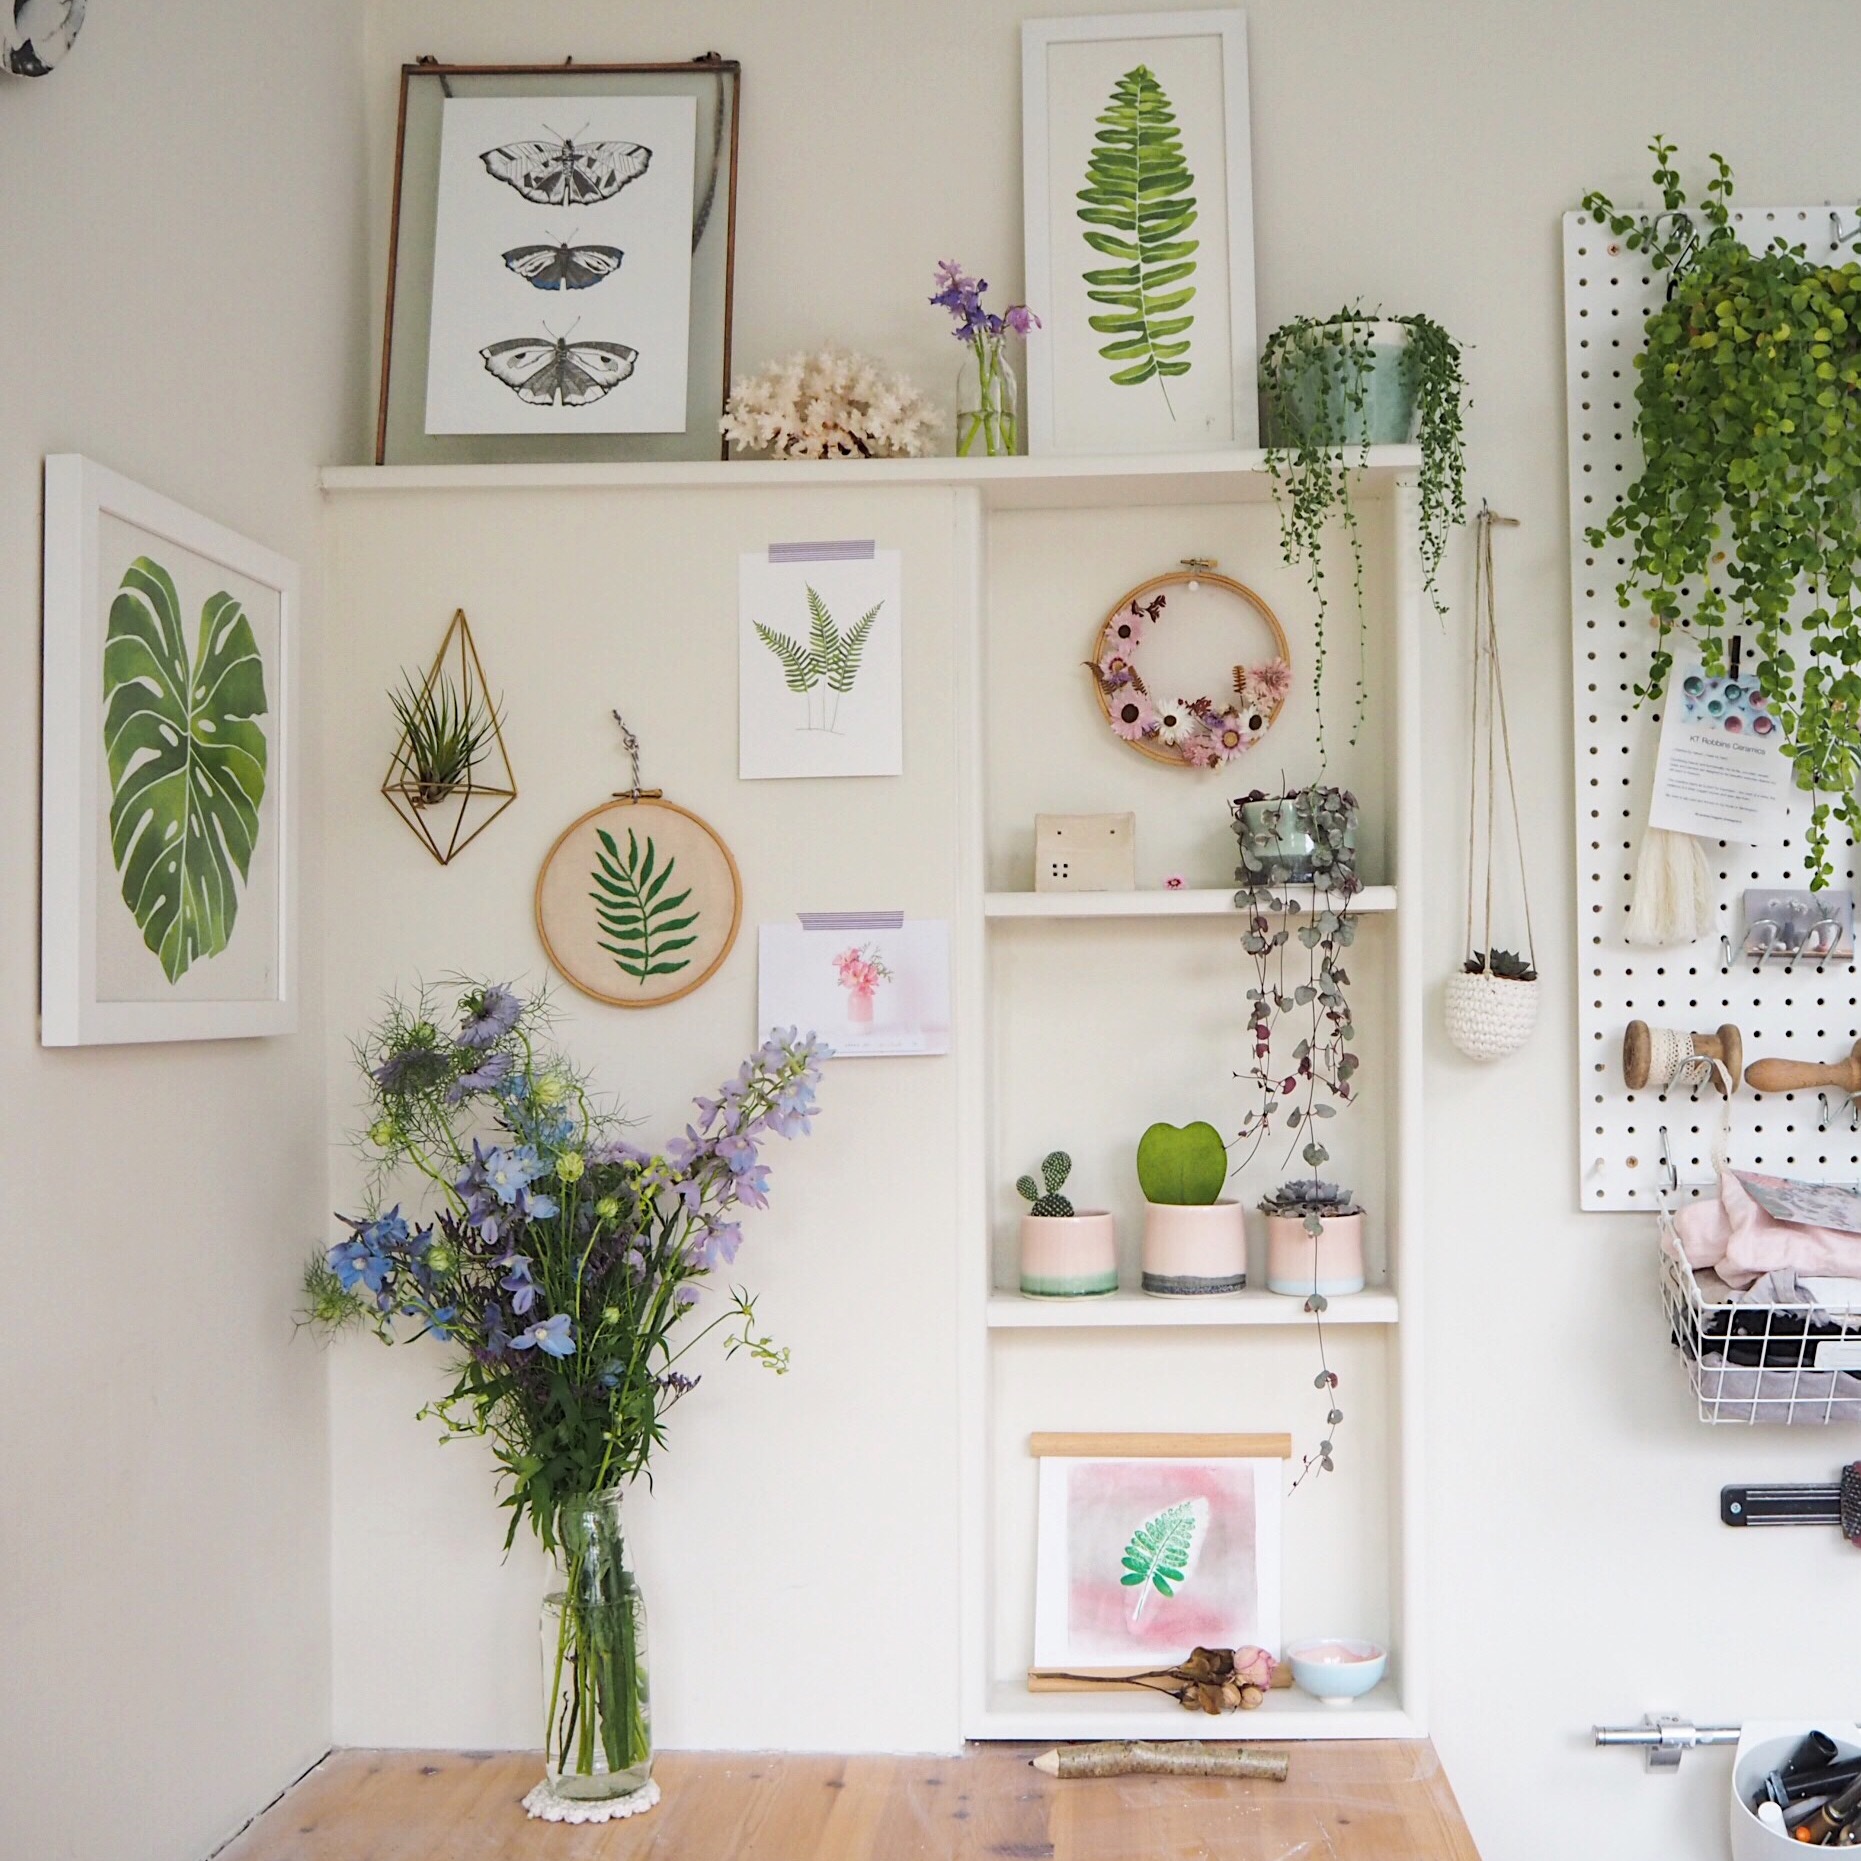
Studio of Kt Robbins Ceramics - i love being able to see my garden and listen to the birds singing as I work.
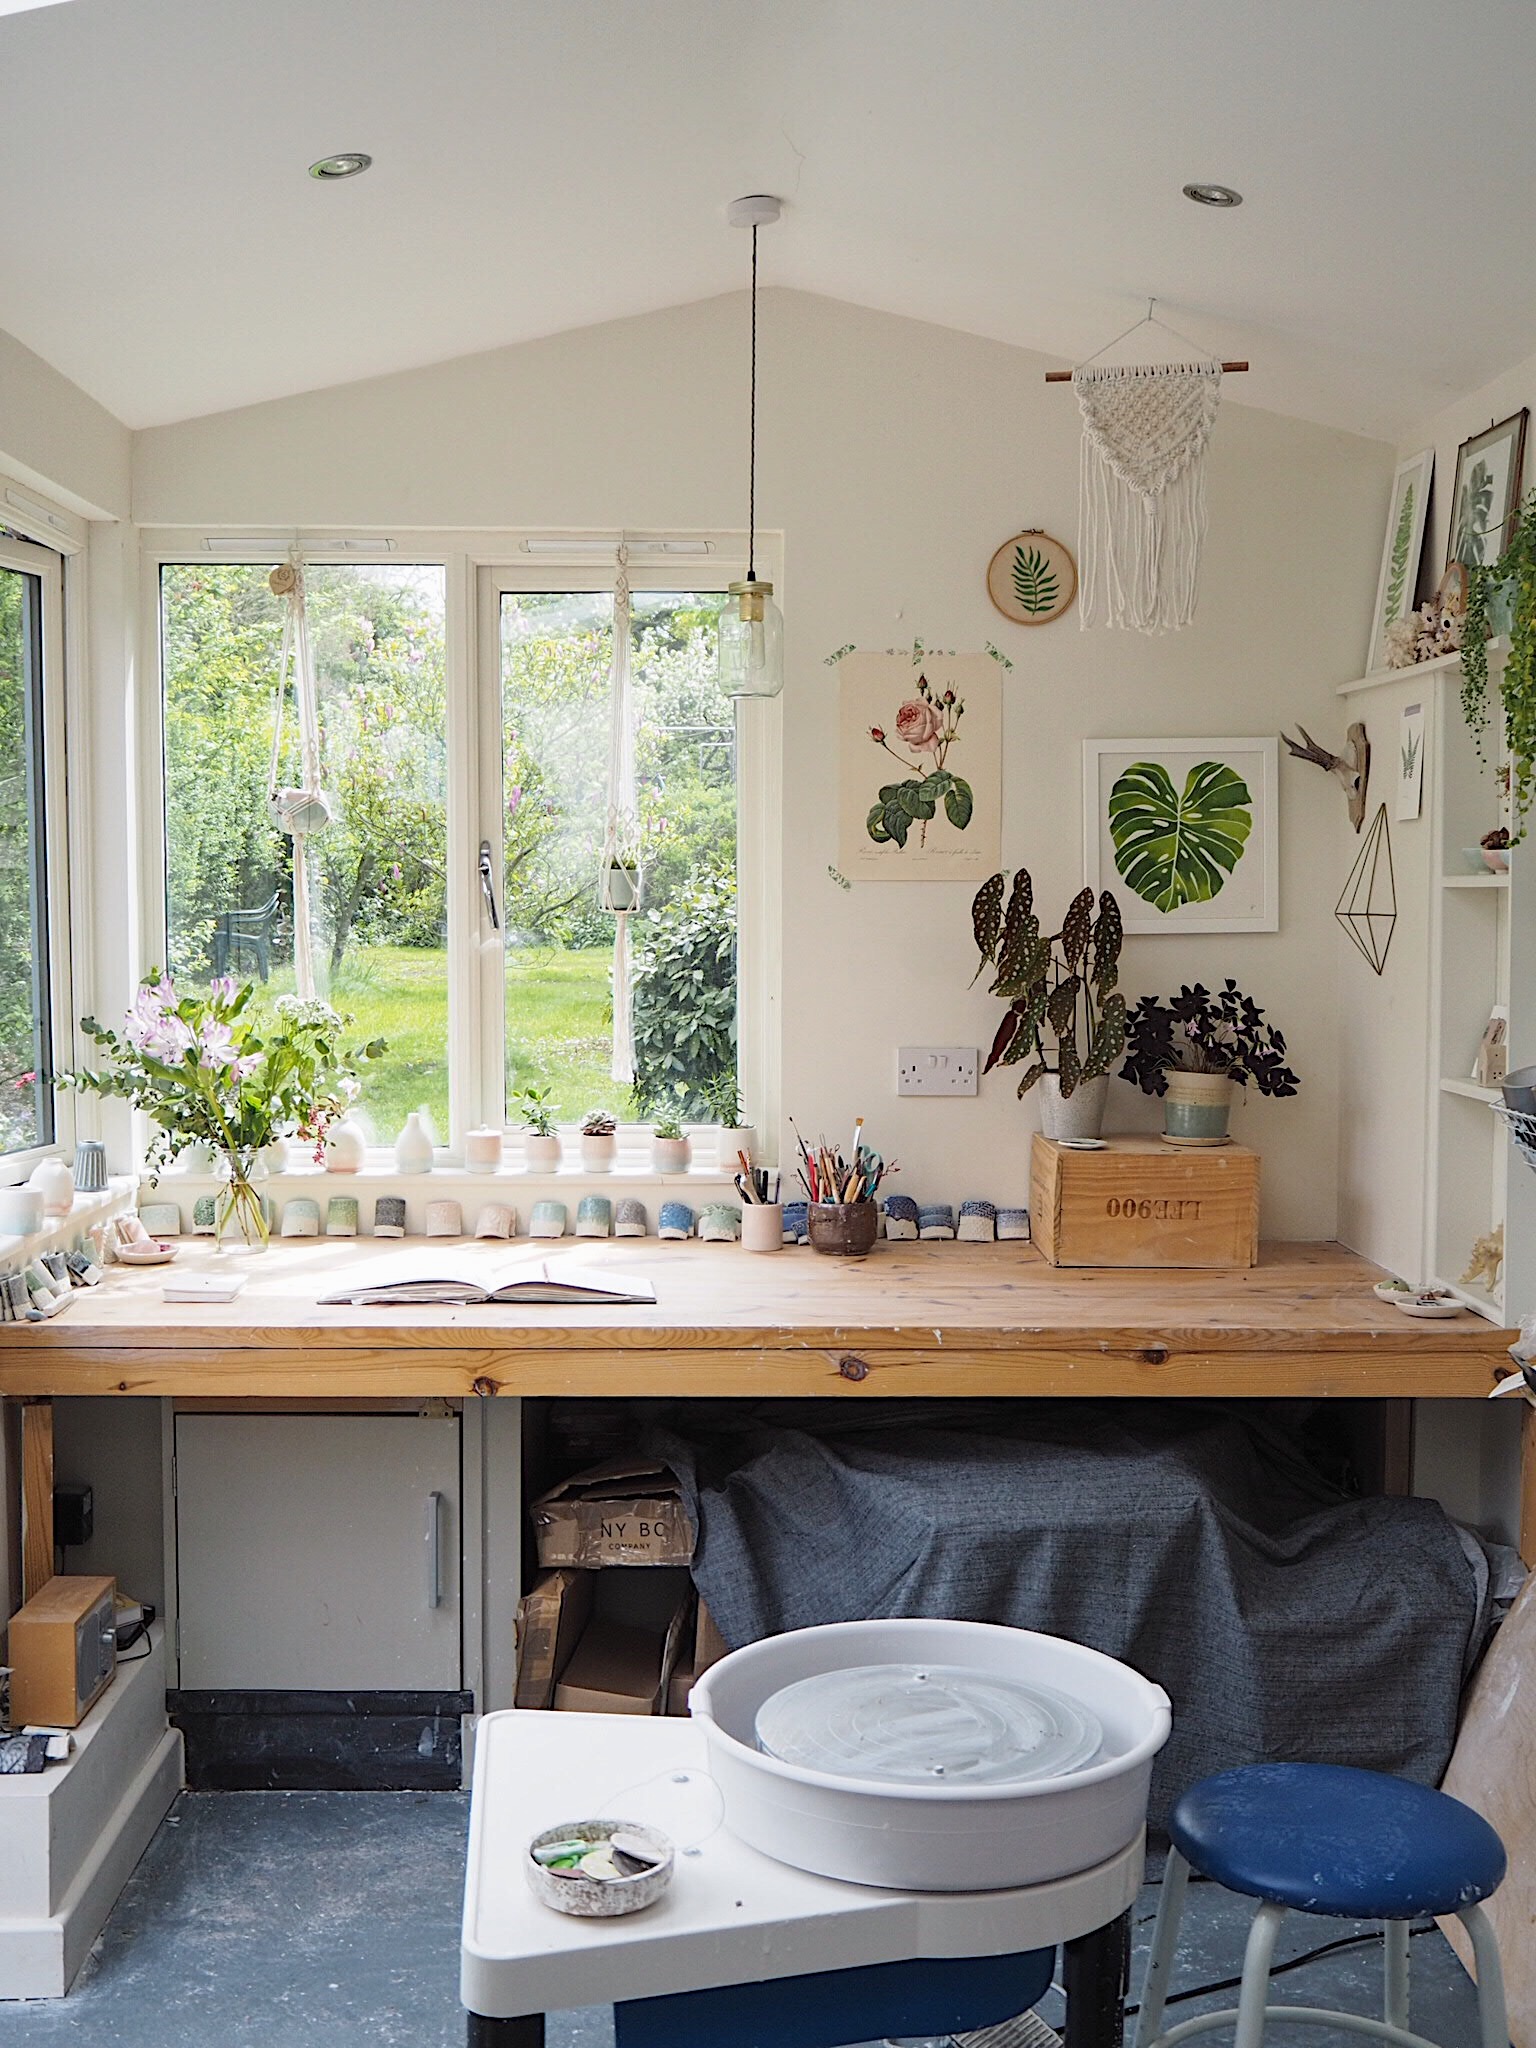
A garden studio filled with plants and flowers for extra inspiration - Kt Robbins Ceramics
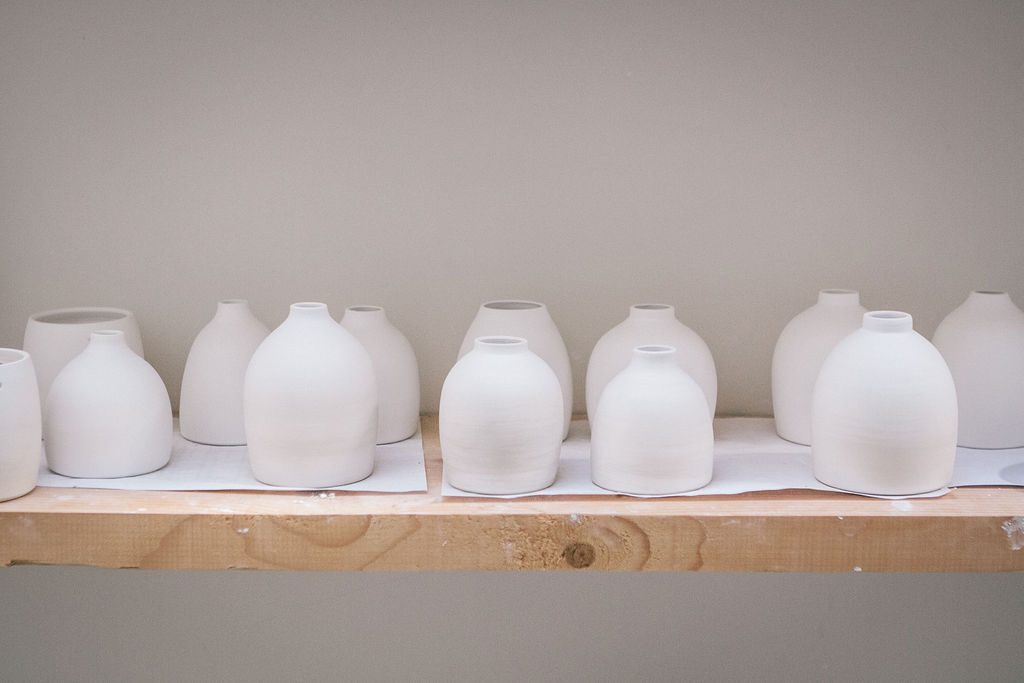
I’ve been in my studio for about 4 years now, and it started as somewhere I could slip-cast my large vessels. During the last two years my work has been shifting and I now almost exclusively throw porcelain on the wheel.
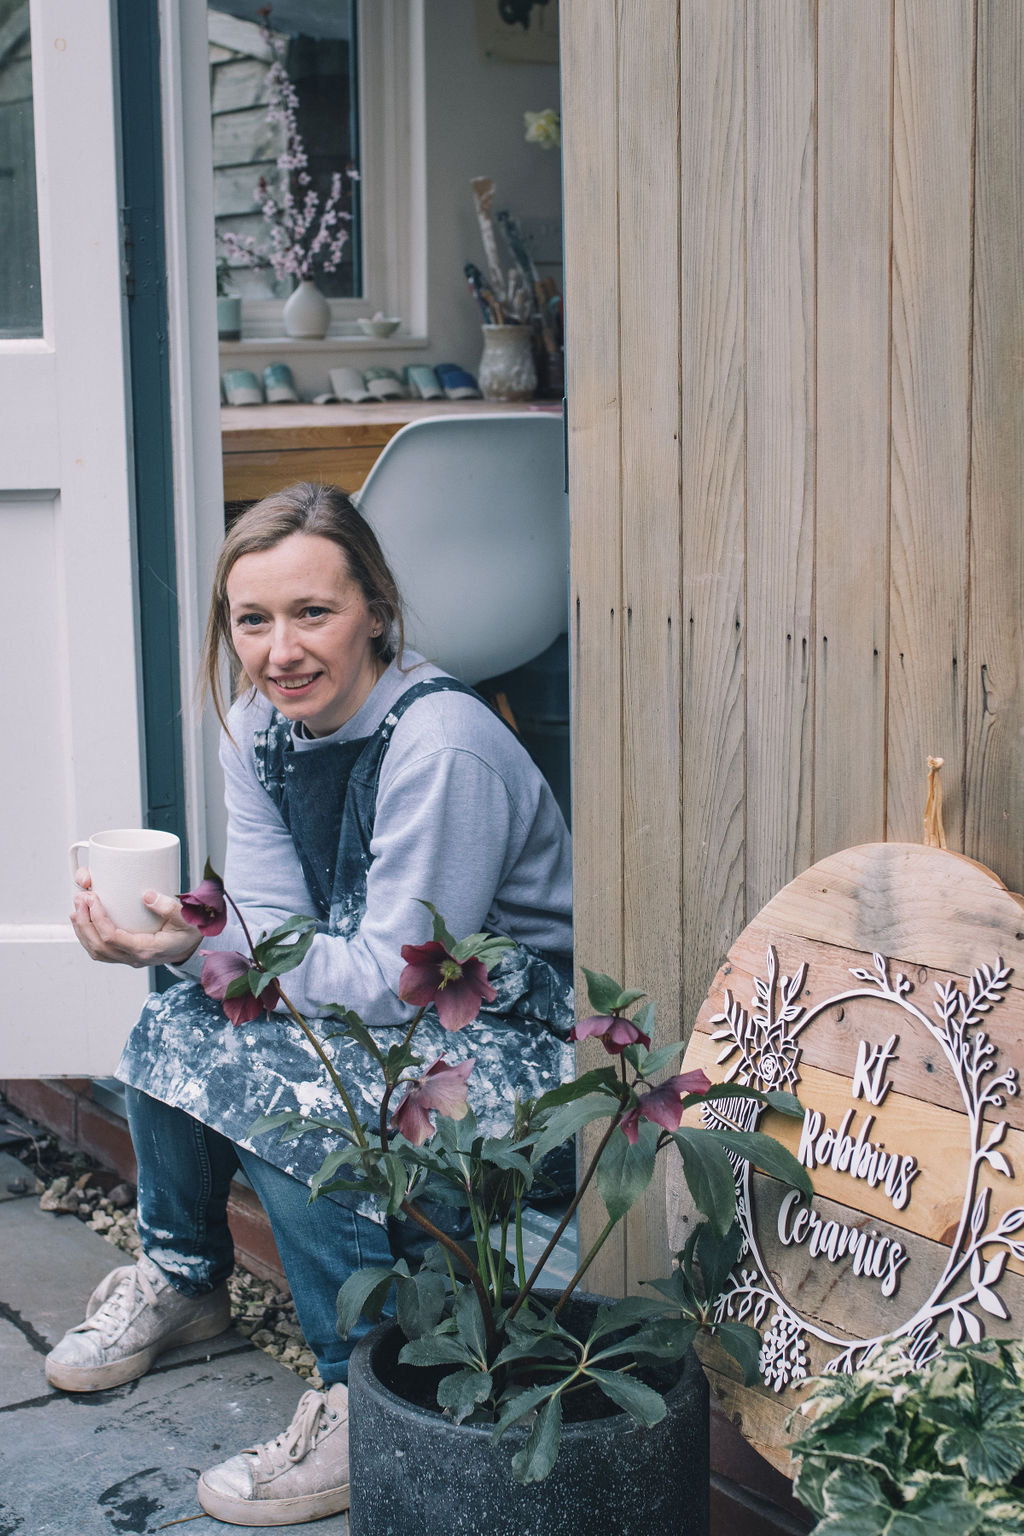
Potter, Katie Robbins outside her studio.
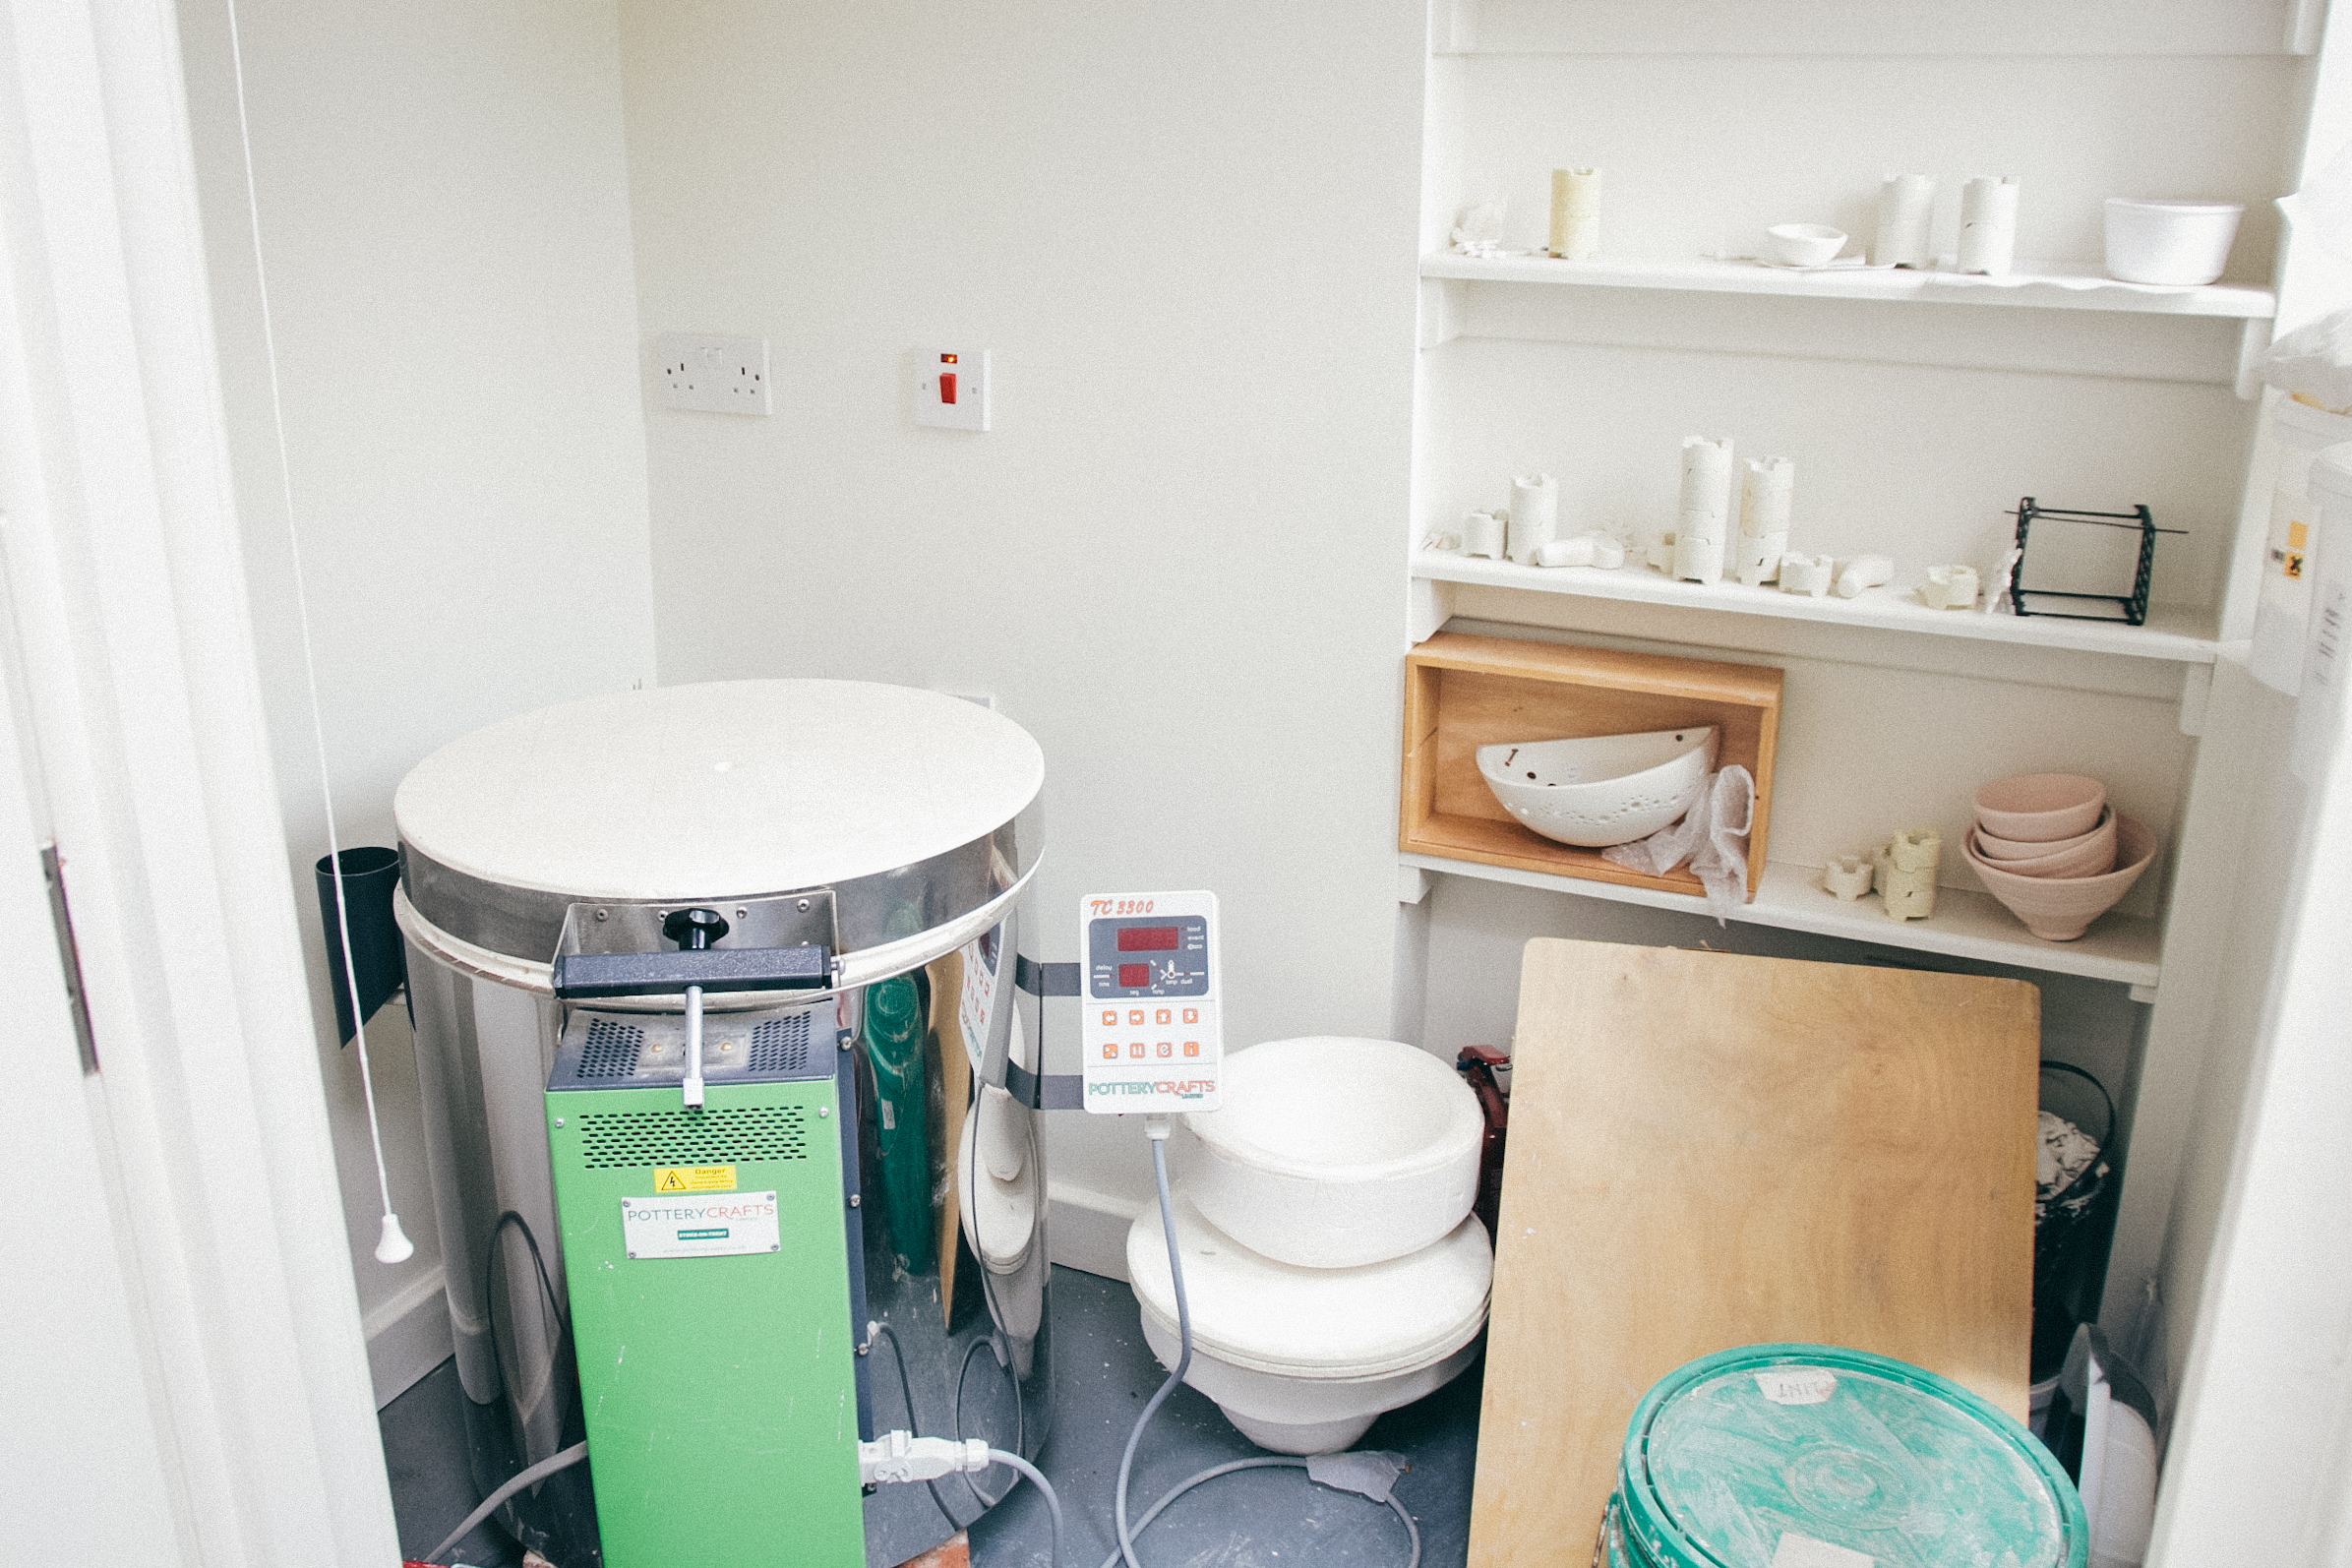
There was a lot to think about when we first decided to convert our conservatory , which was too hot in summer and too cold in winter, into my current garden studio adjacent to our home. (5 long by 2 m wide). It is on the site of a former conservatory which was too hot in summer and too cold in winter to be of any use. As it was built on an existing small plot (5m by 2m wide), it wasn’t necessary to gain planning permission; it was built out of timber frames and is classed as temporary structure, but we did need building regulations as we made some slight changes to the footprint. It has this lovely cedar cladding; as well as windows facing the garden it has two Velux windows, and a door with half a glass pane. It has a separate kiln room for safety which used to be a downstairs toilet. This is now sealed off from the home completely and the studio has its own front door:.

Sunshine and blossom shadows in the studio of Kt Robbins Ceramics
If you are designing a space from scratch you need to think about your priorities for the space and what is most important for you. My key things were a light space, space to work and store my items.
As my studio is fairly small, I wanted to give the illusion of space by painting the walls white and maximising natural light available. I always find it better to use natural light rather than artificial light when I’m working, though that’s not always possible during the winter.
I needed basic elements of water, electricity and also wanted to have heating in there. Running water is essential for for clearing up my ceramics (using clay gets very messy), as well as lubricating the clay during throwing and we installed a sink trap so that the clay doesn’t clog up the drains. We employed an electrician to install an electricity supply for the 7kilowatt kiln, which doesn’t run off traditional mains. As the studio was built at the same time as we renovated our kitchen we were able to extend the underfloor heating in that space too. The heating is a bit of a luxury, but is a great space saver and it never gets the cold in there which most potters normally have to suffer working out of a shed or a garage.
I maximised the work space with built in work-top underneath the main windows and I also have a work space adjacent to the sink so that I can glaze my work whilst standing. There is also space to store the glazes, and glaze materials underneath this.
Storage was a key consideration, so I had extra shelves in the kiln room, as well as shelves to store the work as it dries before firing it.
In terms of storing my tools I have a peg board which makes good vertical space storage, a metal knife rack on the wall as well as some tubs hanging off a pole (from Ikea). Other than that I keep quite a few tools in ceramic pots I’ve made myself.
For anyone considering having their own studio it really is a game changer in terms of your productivity. If you are thinking about your own home studio - you need to consider space and available utilities. It might be that you can use an existing space and just convert it rather than rebuild.. Having running water is probably essential for quite a few crafts. Having space to make and store your items is probably key to most people so a disused garage or an out-house could maybe be used. There are also self-assembly sheds which can be purchased off the internet which I know are a relatively cheap alternative to a brick built structure if you have space in your garden for one. Many new homes now have a small bedroom which could easily be converted into a work room.
I used to work out of a share studio and off the kitchen table. I’m not sure a dedicated workspace has encouraged my creativity, but it certainly reaps rewards in terms of productivity. It is also a bit of a luxury if I don’t want to clear up one day and it gives me lots of space to spread out.

A kiln full of sea-pebbles in a winter palette.
I often get asked details about my kiln. Its a Comet top-loading model which I’ve had for around 3 years from Pottery Crafts and its hardly ever gone wrong. I think I have replaced the elements once and I did knock the thermocouple at the beginning (which is very sensitive and quite pricey), but since then, touch wood, nothing has gone wrong. And whenever there have been issues the technical staff at Potterycrafts have been really helpful.
It’s a 60 litre kiln and is the biggest size that I could have in a residential setting. The size below runs off a 13amp plug and the size above would need two phase power supply (well this is the advice I’ve been given). The kiln came with 4 four kiln shelves and I purchased two extra as my work is fairly small and I quite often end up making flat items too. It used to take me about 3 weeks to fill the kiln, but recently I’ve upped the anti and its around 2 weeks; I can fit around 8 travel cups on a shelf. Its always best to run your kiln as full as possible and to use witness cones to check you are firing at the right temperature. My bisque firing goes to 950 as I like to have the work soft enough to sand it down and remove any slight imperfections. The final glaze firing then goes up 1250 with a soak for 20 minutes. The ramping is 90 degrees an hour up to 600, and then 140 an hour to 1250 which gets to cone 8/9.
I have applied bat wash to my kiln (it came with the kiln); but if you fancy making your own there is a link to a Sue McLeod Ceramics who always shares lots of tips for running your own studio. I also apply a fine layer of silica to the shelves so that if any glaze does occasionally run (most likely from a test tile) then it won’t stick to the shelf. There is nothing more annoying then having to chip glaze droplets off a shelf!
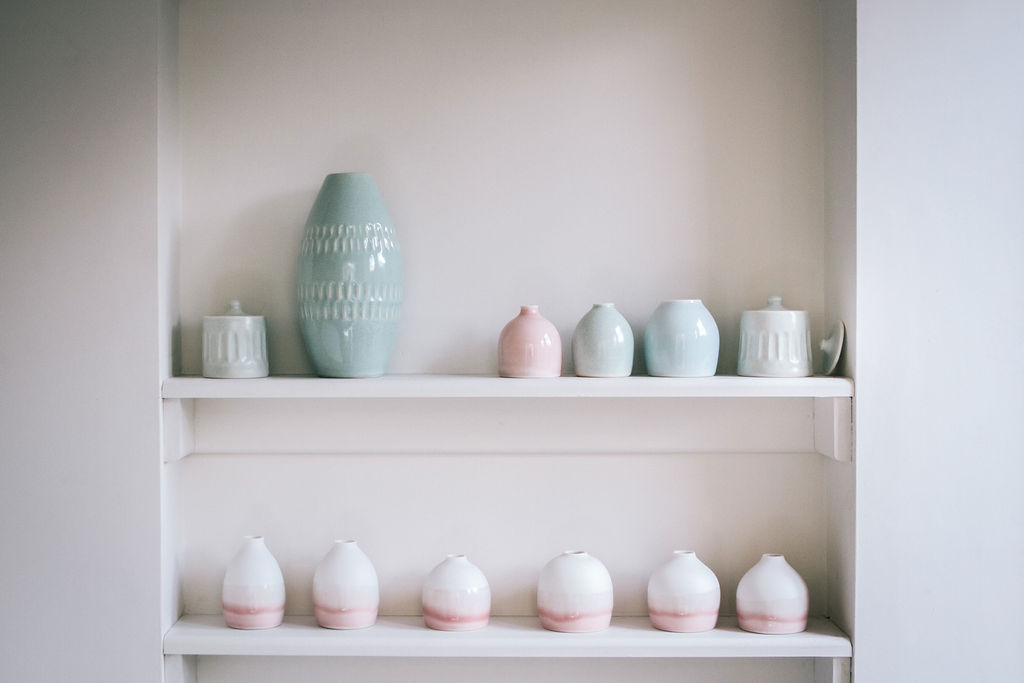
I tend to be attracted to brighter colours that you can achieve on porcelain in an electric kiln. I mix a lot of my own glazes, although do my some commercial ones too from Scarva. My favourite glaze authors include Jon Britt, Stephen Murfitt and Linda Bloomfield. Linda featured my work on the cover of one of her recent glaze books.

My coloured mini bowls featured on the cover of Linda Bloomfield’s reprint of Colour in Glazes
The journey of clay
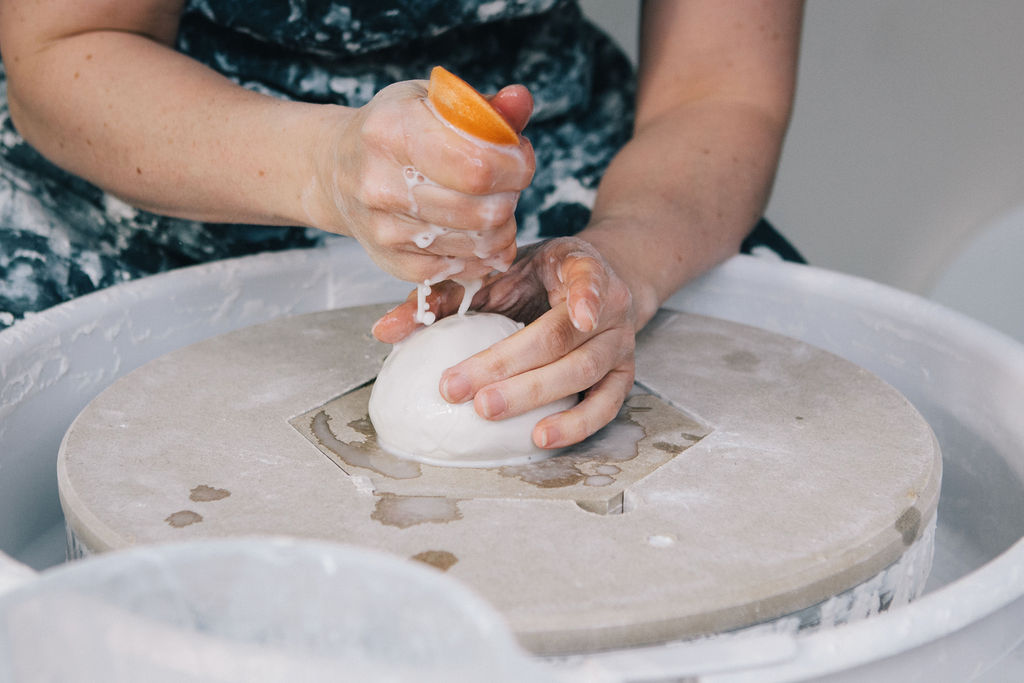
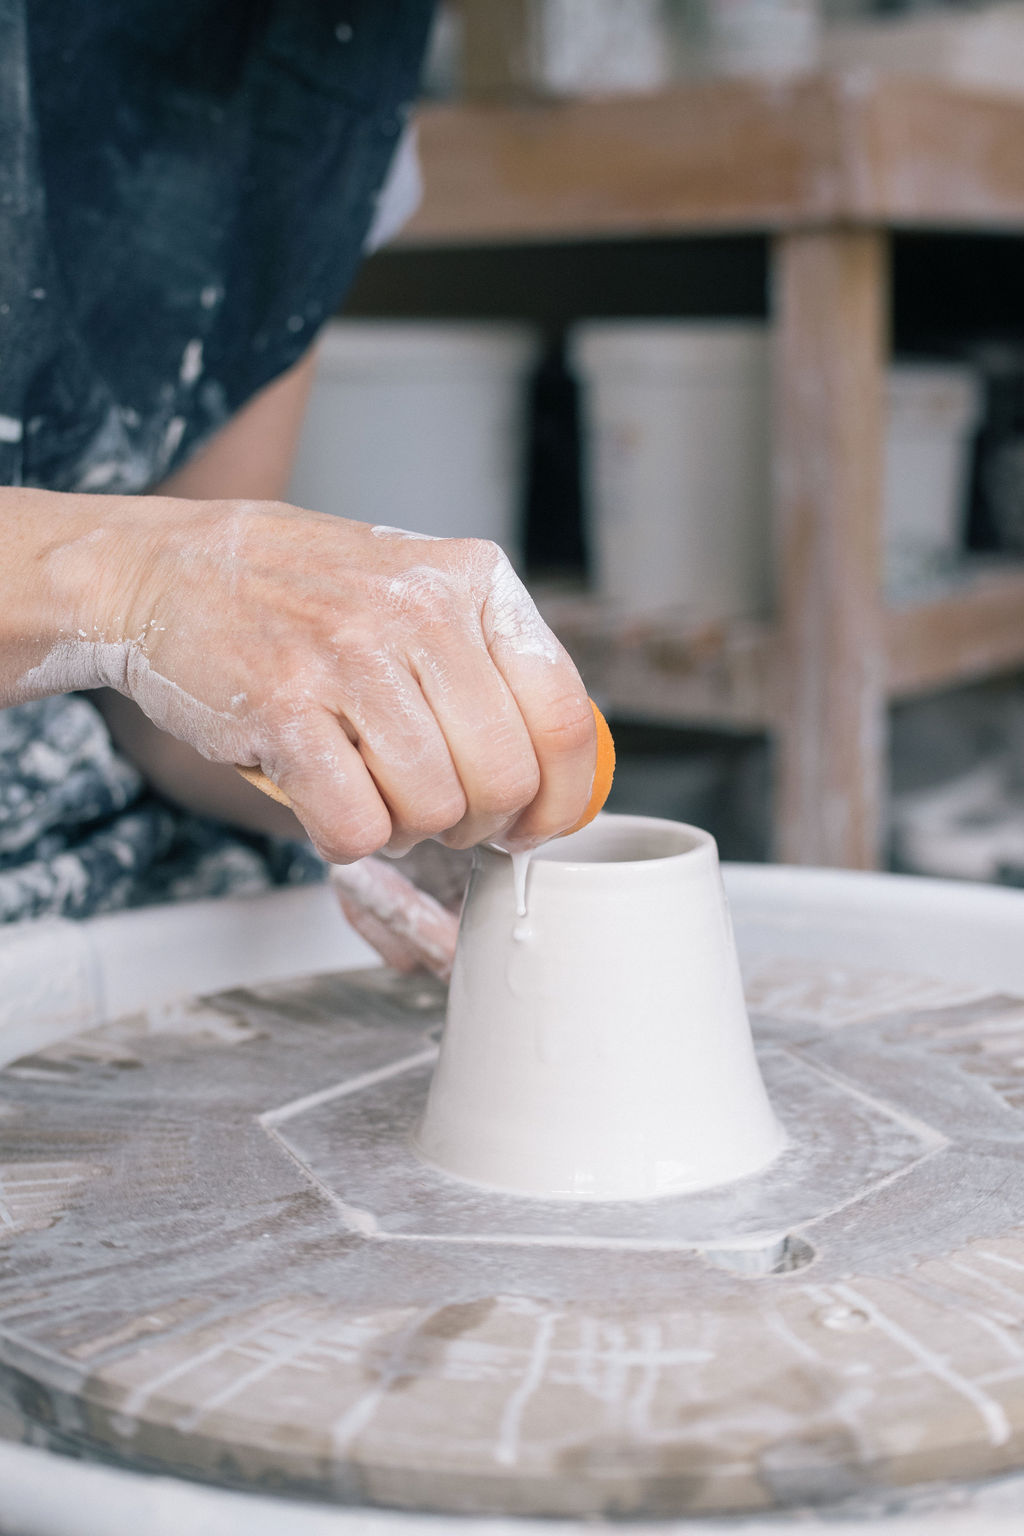
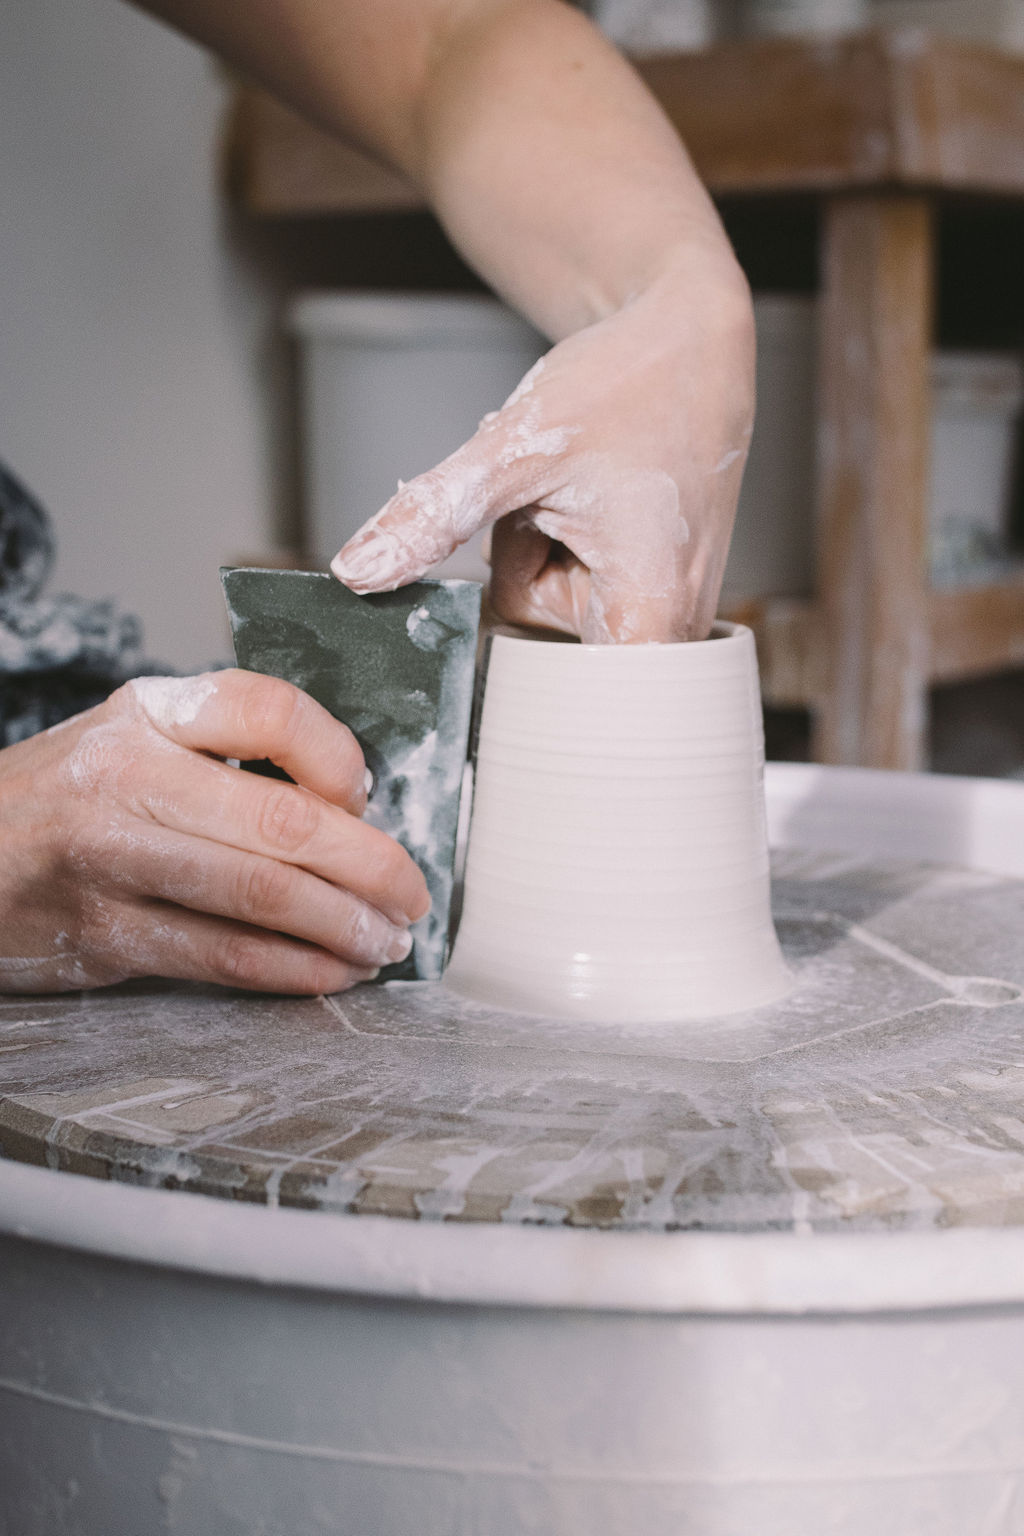
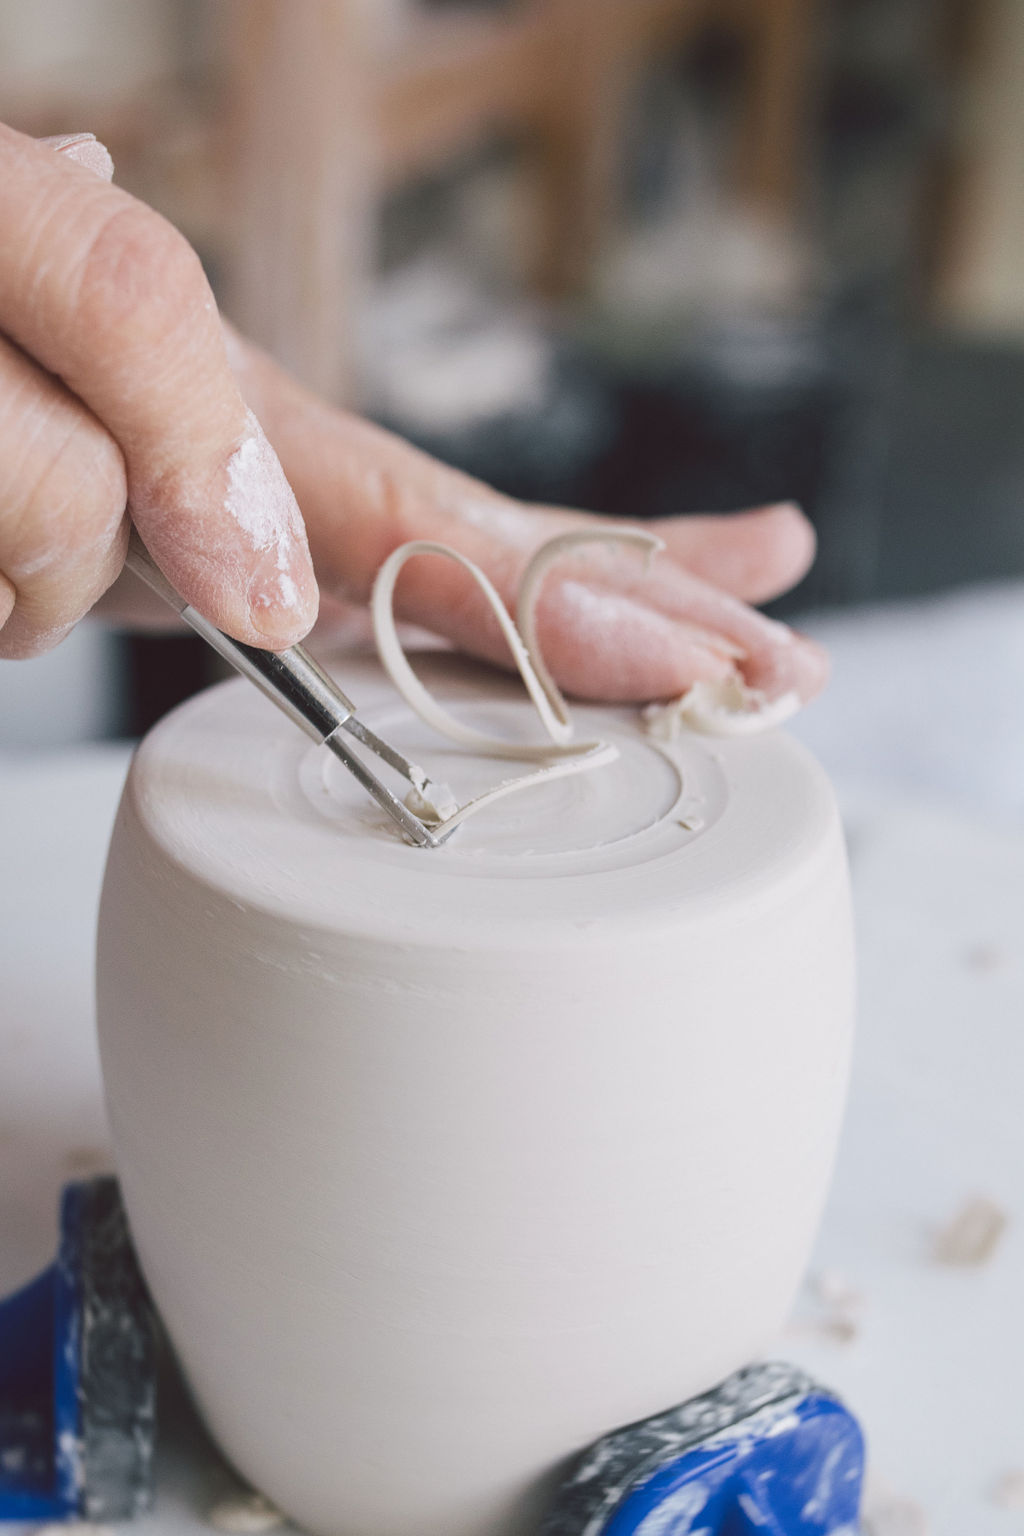
I hope you enjoy the photos taken by Carolyn showing the stages of making a simple pot; how it starts as a ball of clay; add the magic of water, hands and a wheel and something very special happens… This series of images show some of the different stages in making of two different simple pots. Opening up the ball, raising the walls and turning the pot (removing excess clay from the base).


Pottery workshop space of Kt Robbins Ceramics

Through the window of Kt Robbins Ceramics studio

Ideas and tips on planning a home studio from potter, Kt Robbins Ceramics
If you have any questions about how I built the studio or about my process please get in touch.
Best wishes,
Katie